
You’ve recently received your new Biosignals PRO and can’t wait to start recording?
First, congratulations on acquiring your newest research companion!
Second: Here’s everything you need to know to get started.

Biosignals PRO is a next-generation wireless data acquisition system designed for high- performance recording of multiple physiological and biomechanical signals. It serves as the central hub for PLUX Smart Sensors, enabling synchronized, real-time capture of biosignals such as EMG, ECG, EDA, SpO2, respiration, motion, and more. Built for research, biomedical engineering, and education, it supports both controlled experiments and real-world data collection.
Your Biosignals PRO Kit
Your Biosignals PRO kit comes with the following accessories:
- 1x Biosignals PRO device with 10 ports
- 1x Charger
- 1x Bluetooth Dongle
- 1x Reference Cable
- 1x Roll of sports tape
- 1x Quad Lock belt clip
Your Biosignals PRO Device
Your Biosignals PRO device (hub) comes with 10 ports that allow you to record data from up to 10 Smart Sensors and/or biosignalsplux sensors.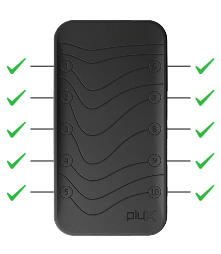
Connect your Smart Sensors directly to any available ports, turn on your device, and you’re ready to record signals.
Note: If you’re using biosignalsplux sensors (the ones with the white cable), you need to use a Legacy Sensor Adapter (see more details here).
Connecting Biosignals PRO to your PC
Biosignals PRO uses our Biosignals Studio software, which you can download here.
We recommend plugging the Bluetooth dongle into your computer and installing the correct drivers (Windows only) before using Biosignals Studio
At this stage, we recommend following this article:
Getting Started with Biosignals Studio
Biosignals Studio is our biosignal recording & processing app for Windows. Follow the instructions below to conduct your first recording with Biosignals PRO.
Add & Configure Your Device to Biosignals Studio
Turn on your Biosignals PRO hub by pressing its button (the button should start blinking light blue) and connect all your sensors to your device.
In Biosignals Studio, start by pairing your device in the Device Manager using the Devices option in the main menu.
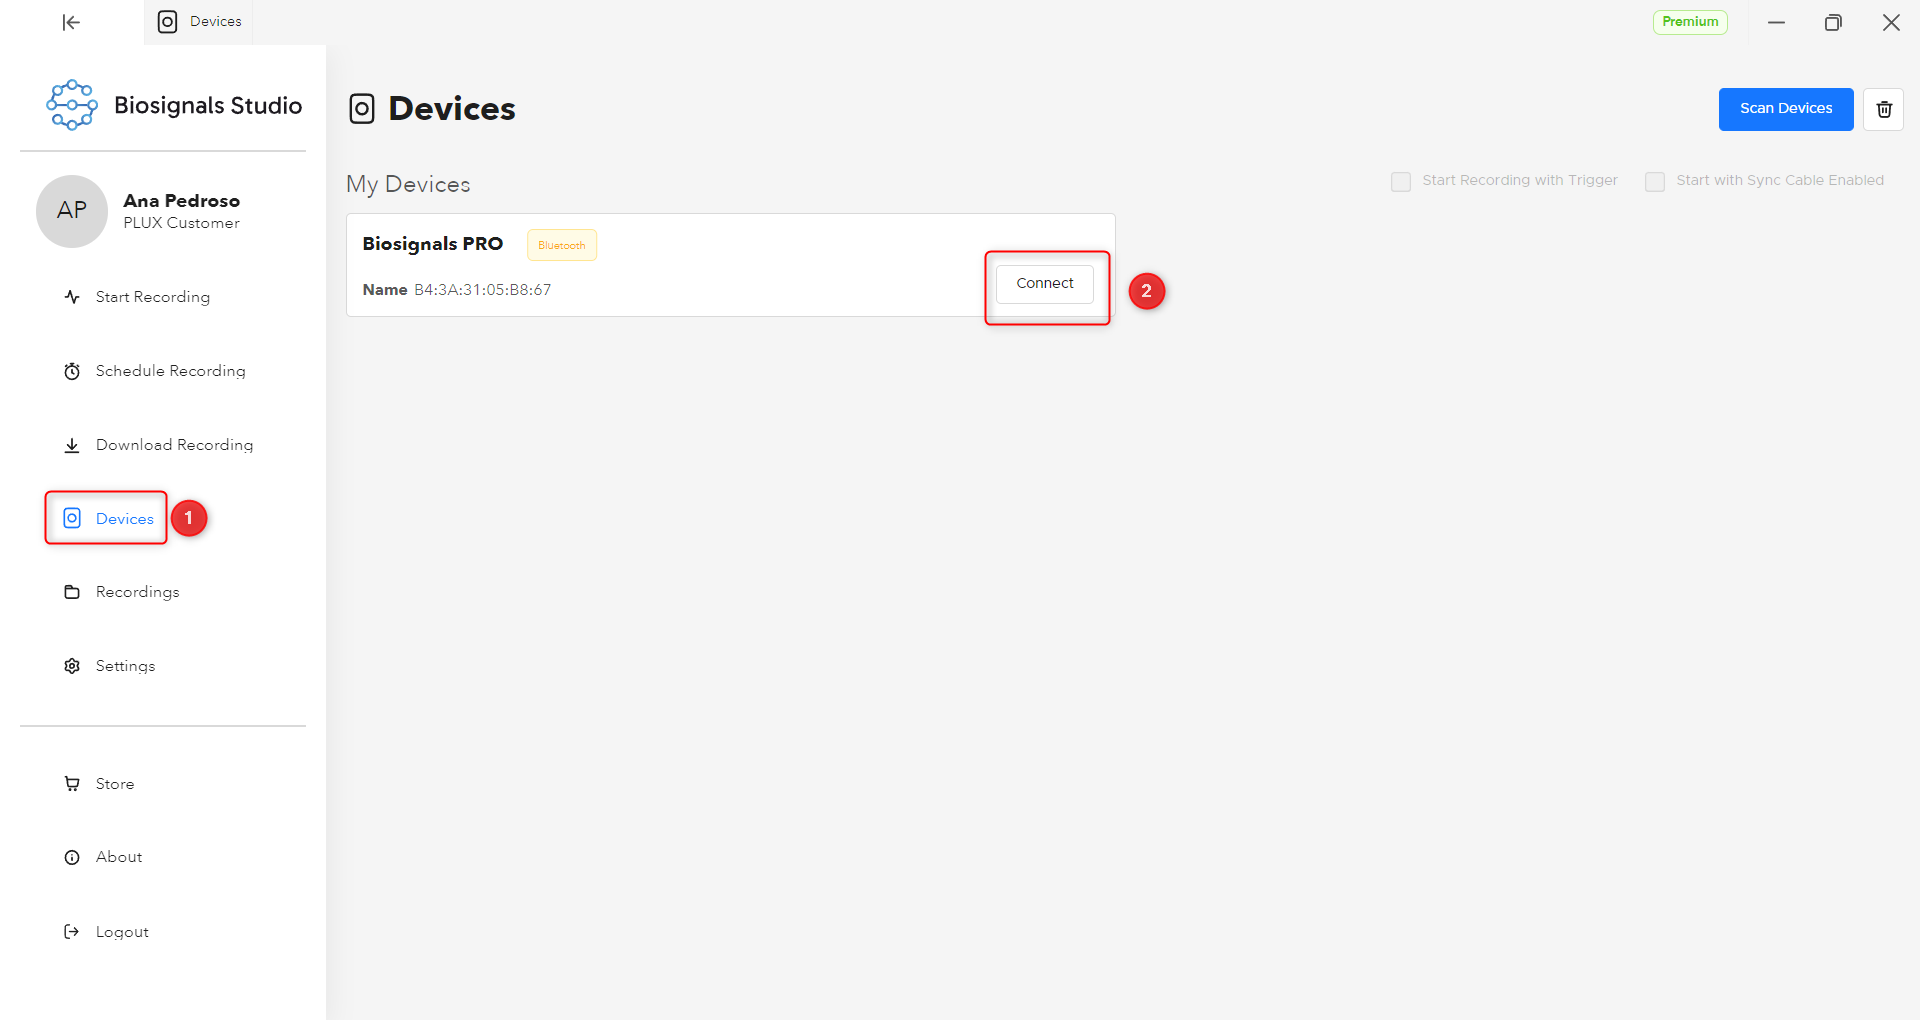
Biosignals Studio automatically starts searching for available devices and lists them in the Devices Found section. Alternatively, if your device is not listed, ensure it’s turned on and click the Scan Devices button to search again.
Click the Connect button to pair your Biosignals PRO device. Once connected, a notification pops up to confirm the connection.
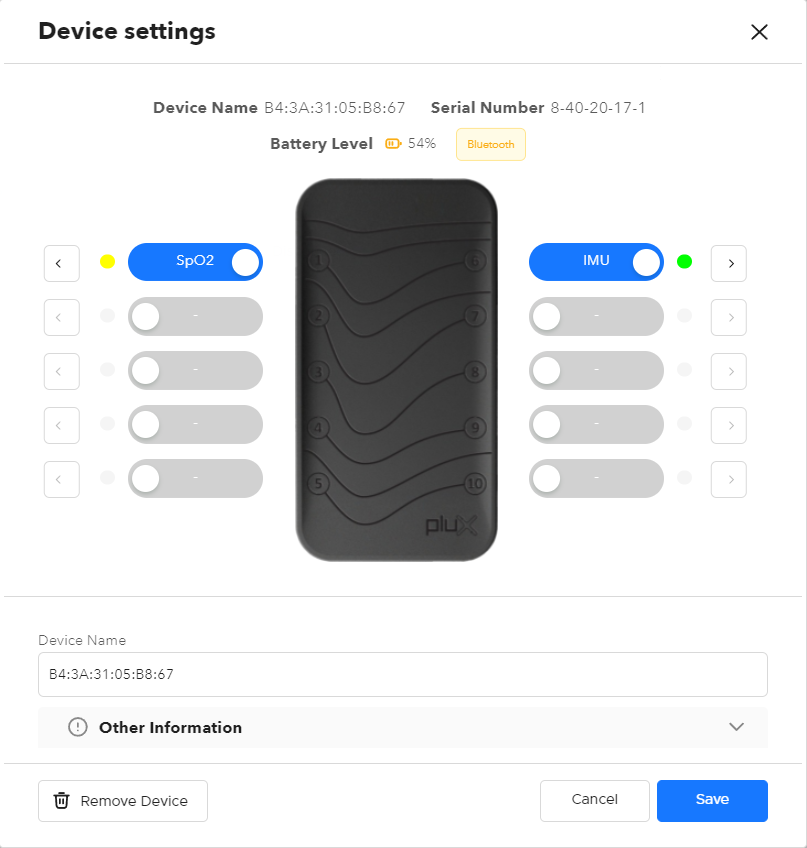
The device automatically detects and configures all connected sensors using default settings. Click the settings icon in the top right corner of the device container and adjust the settings if needed.

Start a Recording
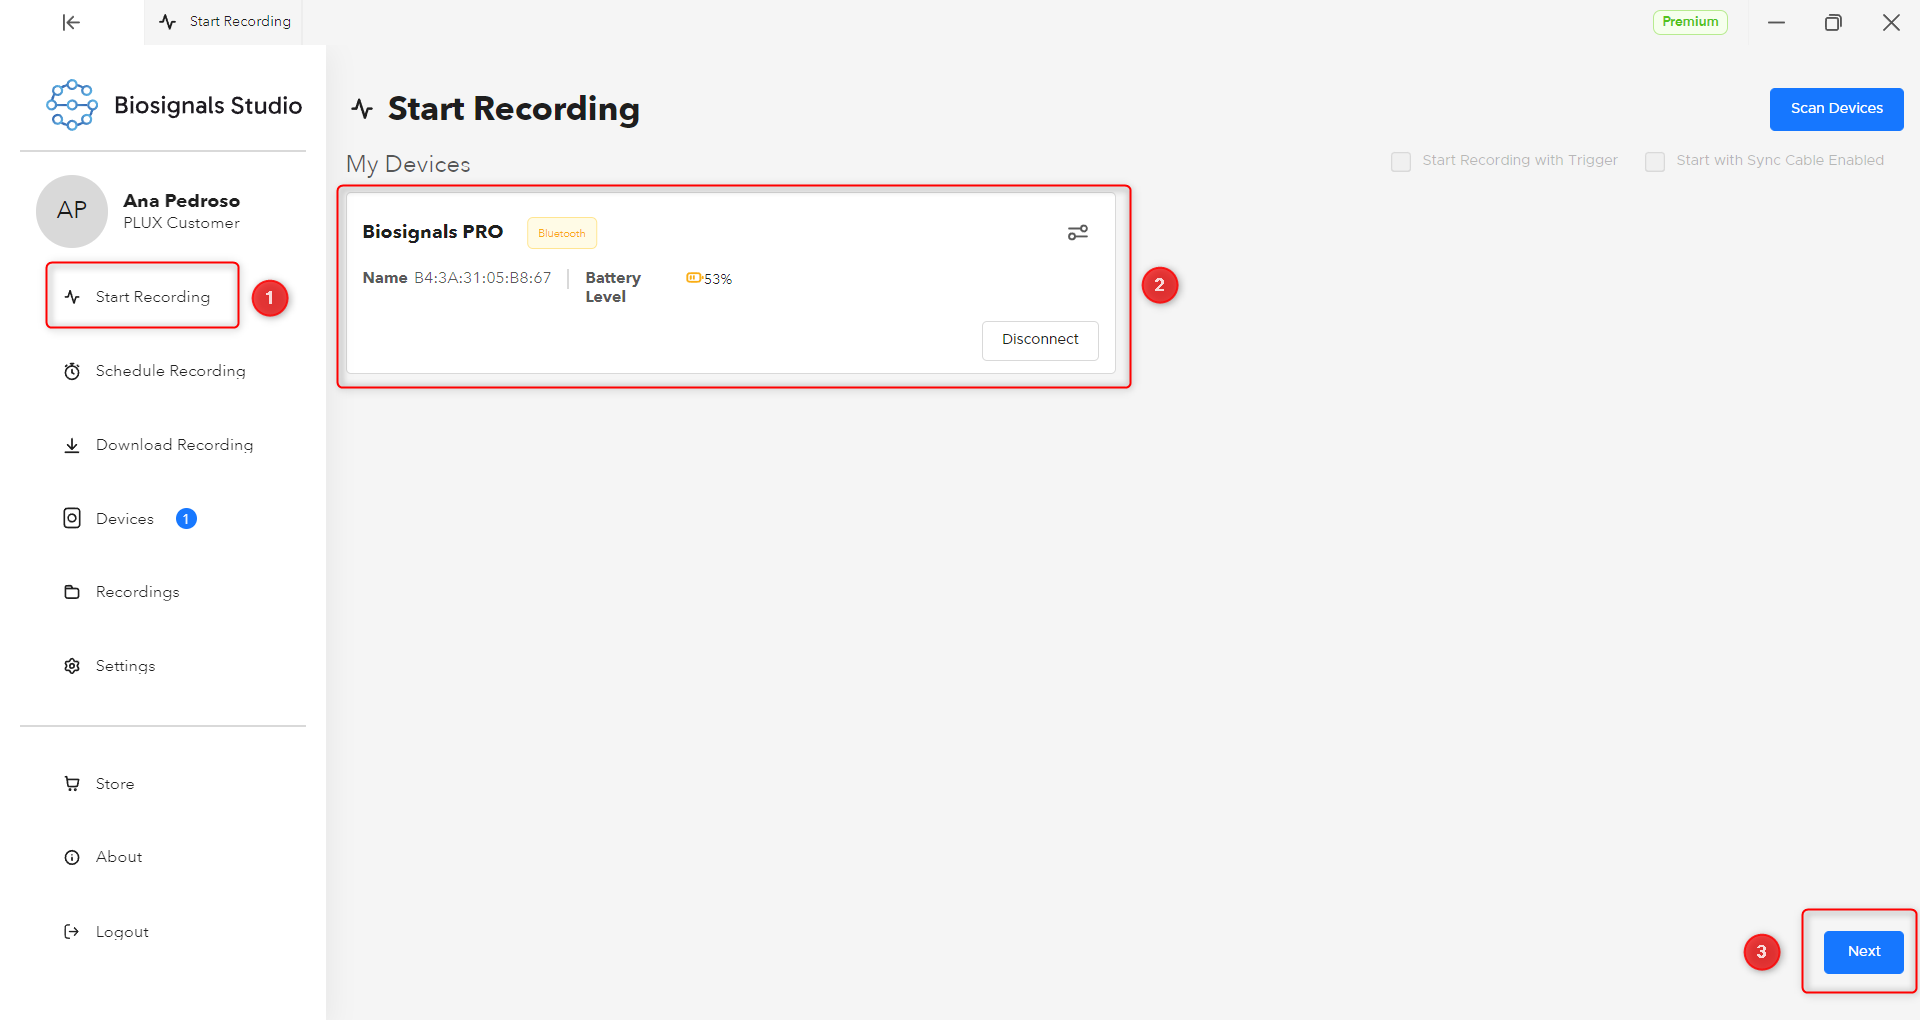
Select Start Recording in the main menu. Select your device for recording (must be in the My Devices section). If you have only one device paired with Biosignals Studio, it will be automatically listed for recording. Press Next.
In the next screen, you can select what channels you want to preview during the recording and choose file prefix, file save locations, among other available features. Press Start Recording to start recording data.
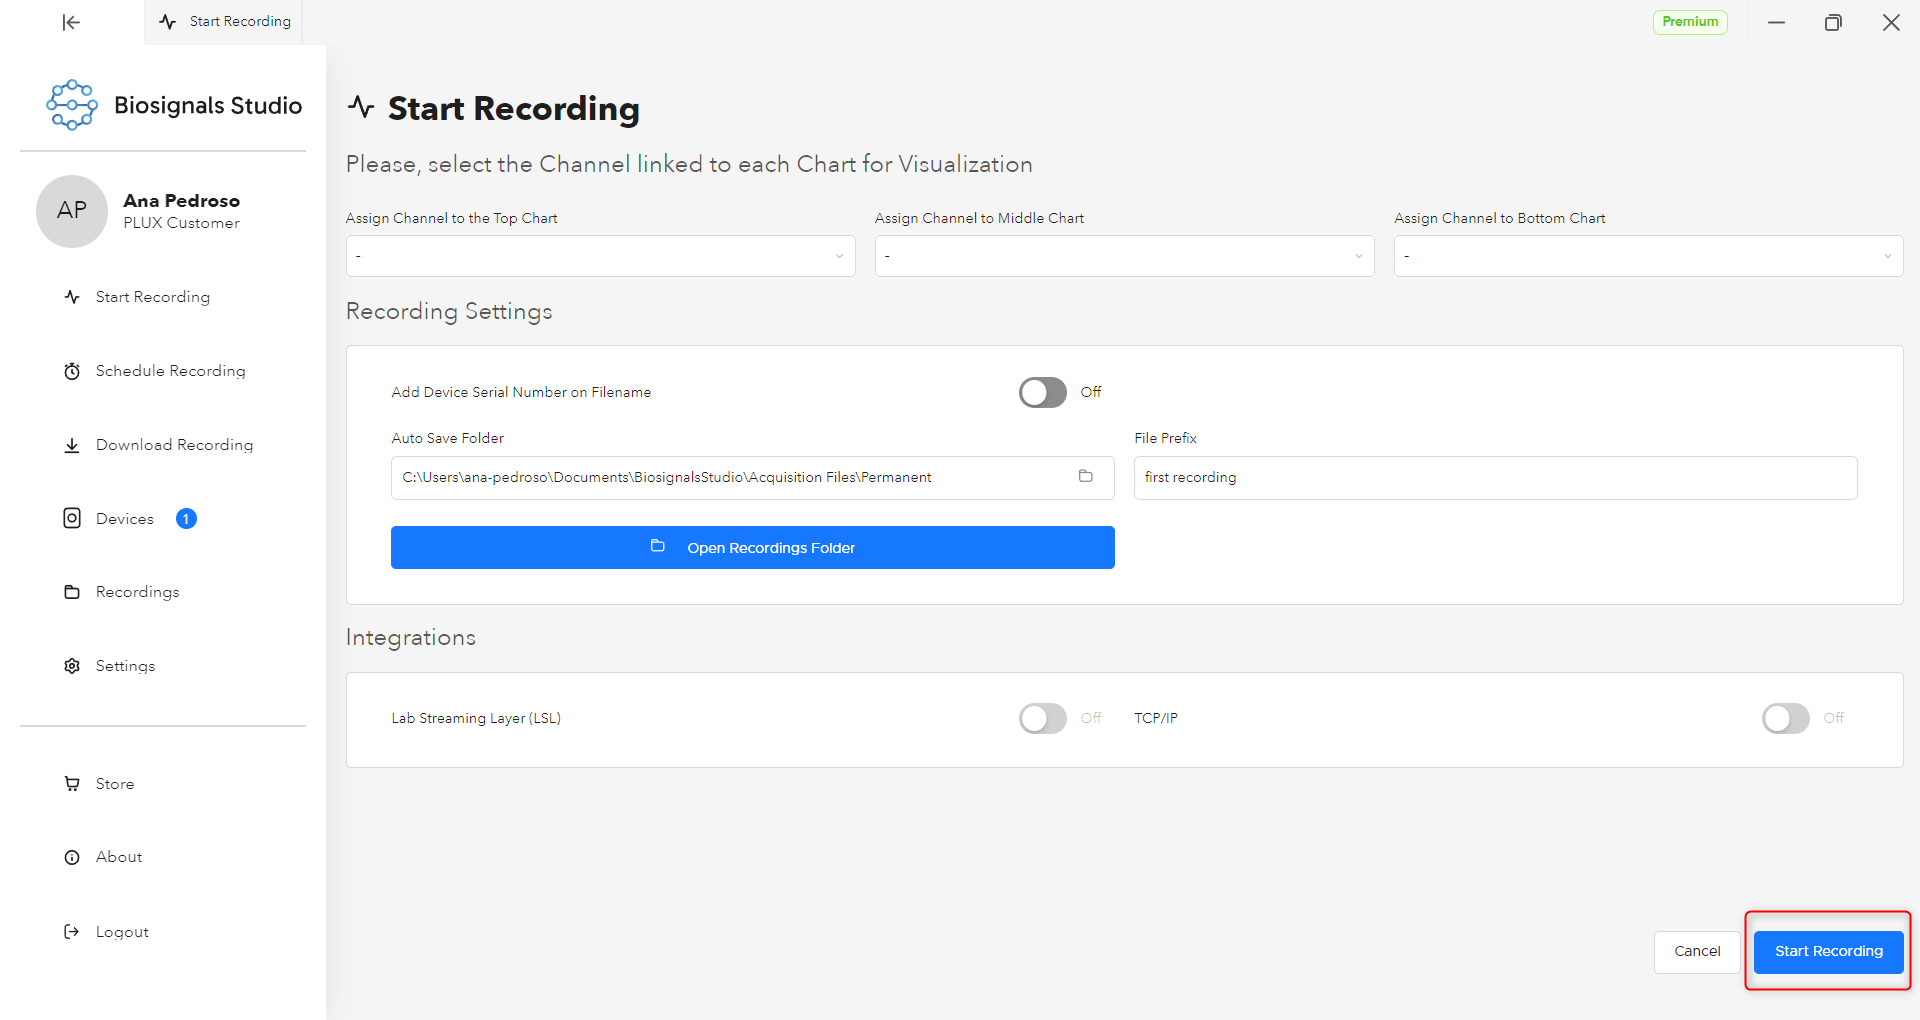
You can end your recording by clicking on the Stop Recording button at the bottom right of your screen.
Visualize Your First Recording
After the acquisition, go to Recordings on the main menu and select the last recording file.
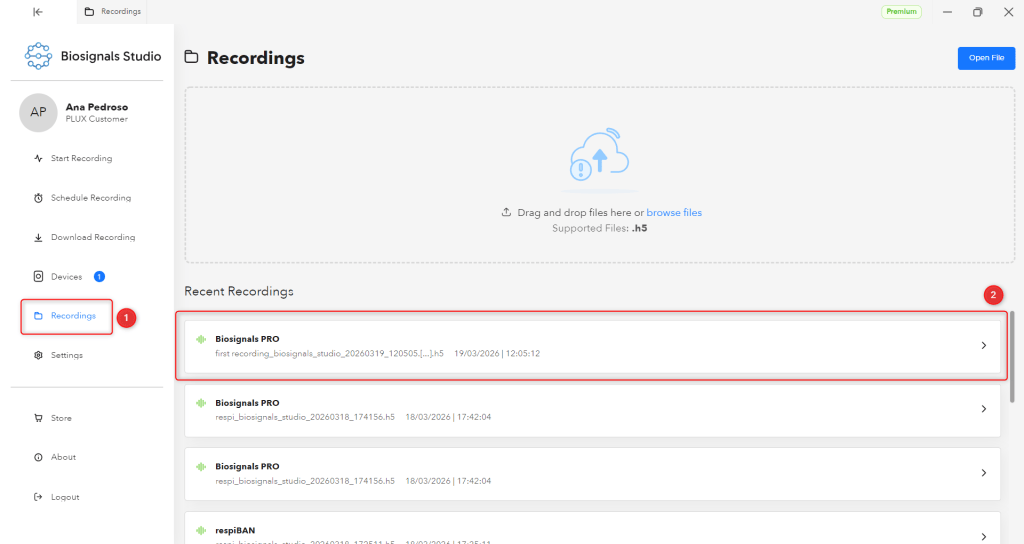
Once you’ve selected a file, Biosignals Studio will load and visualize the signals.

You’re now ready to start exploring all the features of Biosignals PRO!
