What products is this article for?
All biosignalsplux devices (incl. wearables) and the Biosignals Studio Mobile app.

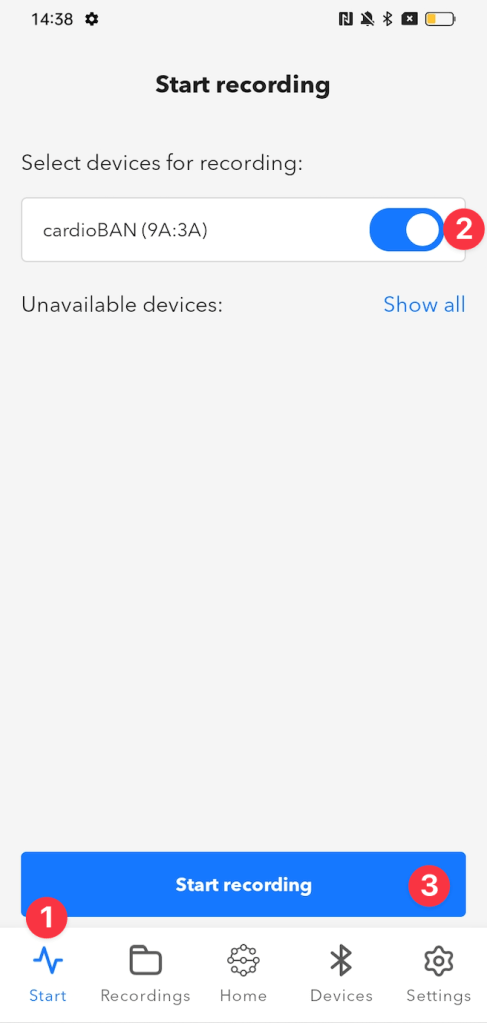
Recording sensor data with Biosignals Studio Mobile is quite straightforward.
After setting up your device in the Devices section, enter the recording mode by pressing the Start menu item (1). Select your device(s) from the list of available devices (2) (here: cardioBAN), and start the recording (3).
You will see a checklist that double-checks if everything is ready to start the recording. If everything is ok, the recording will start. Otherwise, follow the instructions on the screen.
The recording screen displays a timer showing the time passed during the recording and the devices used during the recording.
Press the signal icon of your device to view the signals being recorded.

Pressing the back arrow at the top left, brings you back to the main recording screen. Press the Stop recording button to stop the recording or switch to logging data onto your device’s internal memory by pressing the Switch to data logging button.
If autosave options have been enabled, your recording files will automatically be saved. Otherwise, an additional prompt allows you to select whether you’d like to save or discard the files.
Congratulations! You have successfully started a recording with Biosignals Studio Mobile.
Helps us improve Biosignals Studio
Share your feedback about your experience with this app or add ideas for new features to our features wishlist.